Installation Guide
Preparation (Prior To Installation)
All natural flooring packs should be allowed to acclimatise according to the manufacturers guidelines within a room in the house free of any on going wet work i.e. drying plaster board, newly laid concrete screeds.
Before installing any wood flooring you must check the subfloor/s. Methods will vary depending on their construction, some may be concrete, some wood. The following information will help guide you through what you will need to do to ensure the correct procedures are carried out.
Concrete Sub Floor
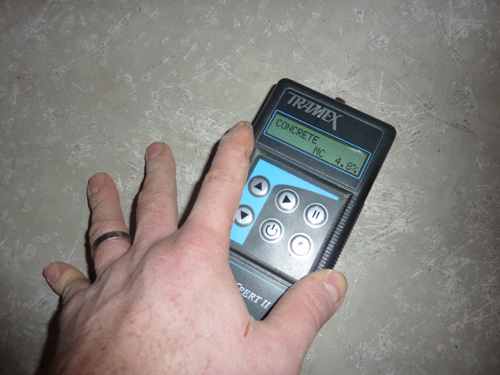
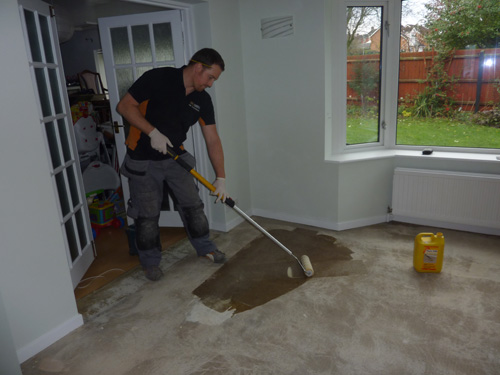
All concrete slabs should be completely clean and flat before wood flooring can be installed. Any unevenness of 5mm over a 3m radius should be dealt with and flattened accordingly. Once this has been assessed then a moisture test should then be carried out using the correct concrete moisture reading equipment i.e. a Tramex meter. The moisture content will be clearly indicated on the device stating whether it is suitable to proceed with fitting the floor. If time is a priority then a Damp Proof Membrane (DPM) sheet or liquid (Sika Rapid DPM) can be applied. This will create a barrier between the concrete and the wood floor therefore preventing any excessive moisture build up that would result in the wood being ultimately ruined. Instructions on how to lay both the DPM sheet and liquid can be found on the product packaging.

Moisture meter reading

Application of liquid DPM to the sub floor
Wooden Sub Floor
When installing wood over a wooden sub floor you must ensure is it sufficiently intact and stable. Any loose sections should be nail downed and if necessary a plywood sheet should be applied over the top of the existing wooden sub floor. This will help reduce any discrepances allowing the installation of the chosen flooring to be done correctly. Any wood sub floor should also be moisture tested prior to installation by using a two pronged wood moisture meter. Follow the manufacturers instructions on how to use the device; this will clearly indicate whether it is suitable to proceed with fitting your chosen wooden flooring.
Installation
Flexible Adhesive (full surface bond)
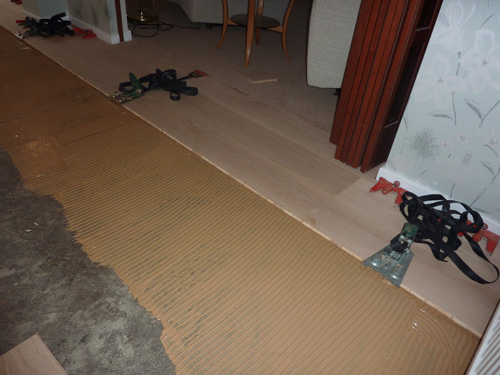
This method can be carried out using all structure and profile types of wooden flooring. Starting with the longest wall in the room, a 12mm expansion gap must be left using spacers around the room perimeter as you continue to install the remaining floor area. Simply apply the adhesive to the sub floor using a notched trowel and spread across approximately 1m² areas at a time. The wooden planks are then placed on top of the adhesive and then pushed together; no adhesive is needed in between the boards as all the underside of each plank is fully bonded. The adhesive will take around 15-20 mins before it starts to cure so you will have an adequate amount of time to manipulate the boards into place if at first they move about. This can be alleviated on larger areas by using floor straps that ratchet the floor area together ensuring there are no unsightly gaps left between each board. The adhesive is fully flexible and when dry is like a rubber so does not crack unlike cheaper rigid adhesive. This allows the flooring to contract/expand in the summer and winter months without upsetting the bond between the sub floor and wooden planks.

Flexible adhesive applied by a notched trowel, then flooring is clamped together with straps
Underlay (floating method)
Underlay can be laid onto any sub floor type but must only be used with engineered wood flooring due to solid wood being too unstable for this type of installation. The underlay is cut according to the shape of the floor space and then laid directly onto the sub floor; no adhesive of any type needs to be used to fix this to the sub floor. Starting with the longest wall in the room, a 12mm expansion gap must be left using spacers around the perimeter as you continue to install the remaining floor area. The engineered wood boards are then placed on top and then glued along the full length and width of each board with WPVA glue. If using engineered wood that has a click system then their is no need to use any adhesive along the edges of each plank, these simply click into position to complete the installation. The flooring does not need to be glued to the underlay hence the term ‘floating’. Floor straps can again be used to help ratchet the floor area together if using a tongue and groove system to help rid of any gaps found throughout the floor space.
Secret Nailing
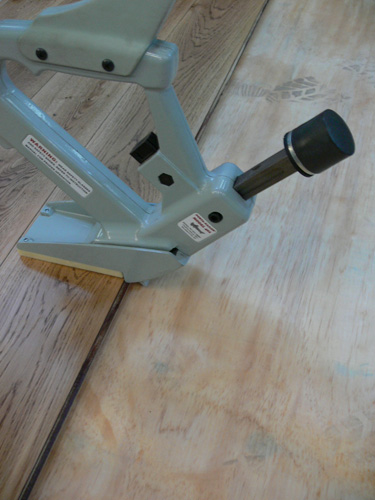
When secret nailing always make sure you use the correct nailing gun equipment i.e. Portanailer. These nail guns use specially designed flat nails that have teeth on either side to ensure the wood cannot come loose when the floor is contracting and expanding during the colder/warmer months of the year. Under no circumstance should you use standard nails to carry out installing a wooden floor. Only use a nailing gun when installing onto a wooden sub floor. This must have a grain in order for the nail to grip correctly so must not be a wood particle board such as chipboard etc. Solid and engineered flooring can be used in this type of installation but both must be 18mm in depth or above. Installing over joists is also possible but again please make sure the flooring is a 18mm or above load bearing product.
Using a nailing gun is simple, position it over the plank’s edge where the tongued side profile is found and by using a mallet, a nail is then seated into the plank at a 45 degree angle. The nail is completely hidden from view and securely attaches the wooden planks to the sub floor.

Secret nailing
* Please note the information above is a guide only. A professional floor fitter should always be used or consulted when installing any type of wood flooring.


